Pages

Monday, November 8, 2010

Curing Olives

Often I try to escape the kitchen.  I'm in there ALL the time.  I tell myself that I'm crazy to spend so much time in there and why don't I go find something else to do.  Go learn a new skill!  Knit a scarf!  Run a marathon!  Do something besides COOK!

So last Sunday I made a trip to my friend Caroyln's house for a scrapbook sale leaving my spatula behind but taking Mike with me for the outing.  My poor scrapbook has been patiently waiting for me to finish it for the last six years.  Yes, six years ago my daughter and I went to England.  I came home with high expectations and grand visions of a scrapbook to immortalize our memories from that most fantastic journey.  And my outing to Carolyn's sale was inspiration to finally get it finished.

Well I've never been to Carolyn's house and upon arrival I immediately noticed a large olive tree in the front yard beckoning to me.  The tree was magnificent and covered with gorgeous shiny green and purple little olives.  I reluctantly pulled myself away from the tree and entered the party.  Being that I actually do get a thrill from crafty supplies and decorative papers, I made my scrapbooking purchases and Mike, knowing me so well, asked about the olive tree.  Carolyn was more than happy to show us the tree and the many others on her land and was very willing to let us pick them!  I was THRILLED to say the least!  I've never cured olives before, but I could feel the excitement spinning up through my belly at the thought of trying something new in my kitchen.

Two days later Mike and I returned to Carolyn's house with a big bucket ready to be filled.  For an hour we picked those pretty babies off two of the trees.  I could have picked all day, such was the joy I felt in harvesting food.  Local food, grown in my neck of the woods on a tree just waiting to share her bounty and become tasty little morsels to eat!


Mike and I picking olives

I just can't get enough!

Hmm now how to cure those olive?  Thank the heavens for internet!  After searching many websites, we found a recipe that seemed easy enough.  So how exactly did we do it?  First, we rinsed the olives in the sink to remove any debris.  Second, we punctured the skin of the olive with a knife, making a small slit in the skin without slicing into the pit.  Third, we filled glass jars to the top with the olives.  And fourth, we poured a salt water mixture over the olives up to the very brim so all of the olives were covered.  (1/4 cup of salt to 4 cups water)  To keep the olives from floating up to the top and peeking out of the water, we placed drinking glasses in the jars.  It's working pretty well so far!

Our loot in the sink ready to be washed

Adding a cut to the skin

And now we wait!

So how long does this olive curing process take?  Well according to my internet sources, six weeks.  Each week the water must be changed and new salt water added.  This coming Tuesday will be the first water change.  And just a hint, place a cookie sheet under your jars.  As the olives are curing water is slowly dripping over the top and making a gooey mess!  I'm excited to have another experiment on my counter.  It's most definitely not the first and certainly won't be the last!

So my attempt to leave the kitchen and find other ways of creating and doing actually led me BACK into the kitchen!  What!?  I guess I can't escape.  I went for scrapbooking supplies and ended up curing olives!  Somehow or another I always find myself back in the kitchen making some kind of tasty temptation or crazy concotion.  Perhaps it is just my destiny to be the Kitchen Witch.

And by the way, I did actually finish that scrapbook.

Friday, October 22, 2010

Learning to Say NO

This morning was a pivotal moment for me.  Like every weekday morning I arrived in the kitchen at 7:00 am to fix breakfast for my two teenage girls before they leave to catch the bus at 7:35.  It is something I do as a mom to ensure they always start their day with a full tummy and good nutrition for their brain and body.

But this morning I was surprised to see the coffee pot on the counter full of coffee and a mug nearby full of the same.  Alicia, my eldest, my 16 year old.  She got up very early this morning to get herself ready for a busy day.  It's homecoming week and as a cheerleader, Friday of homecoming is a monumental day.  I was upset to see the coffee pot.  I've been watching her struggle with the highs and lows of sugar and caffeine cravings and though she consciously knows that caffeine sends her down a dark path of feeling unwell, she was caving in.

She arrived at the kitchen table for her breakfast and I asked her about the coffee.  Her reason for the coffee?  She likes the taste.  Well I know that wasn't the truth, coffee smells good, but it doesn't taste good until she fills it up with sugar.

At that moment, I made the decision to tell her NO.  NO, she was not going to drink the coffee or take a mug of it to school.  Her 16 year old independence flared up and I could see the anger blazing forth from her eyes.  "WHY?"  she demanded in her best "Housewives of Orange County" head shaking attitude. 

Instantly time seemed to stand still and I felt deep inside of me a conviction and commitment to my NO.  A conviction and commitment that for the first time I was able to hold onto.  I could see that in the past I would relent to soothe her anger so as not to lose the love of my child.  And because of my inability to say NO, I was allowing her to struggle with addictions that in her 16 years she couldn't handle. 

I could finally see that in saying YES in the past I was fooling myself into thinking that this was how I showed her my love when really saying YES came from a place of fear, a fear that she would not love me if I said NO.  Now it was so clear to me that saying NO was actually the true way to show her that I loved her enough to stop her from doing something that was harming her.

I gazed right back at her and stood my ground unwavering in the commitment I had made.  So I replied.  "You can be mad at me, but I am your mom and therefore responsible for you which includes your health, so I am saying NO.  I can not stand back and watch you harm yourself."  She glared for a minute longer and then quite suddenly her demeanor changed.  I swear I saw relief come over her body and my happy-go-lucky child came forth.


Over the years in my attempt to allow her to have choices and independence, I came to see that I had given her too much independence and responsibility in taking care of herself.  It is enough for her to take on cheer leading, Earth Club, honors classes, P-SATs, friends, her bedroom, her laundry, preparing for college, and all the fabulous things that come with being in high school.  But asking her to take responsibility for her food choices was just too much.  It is my responsibility to feed her well, to keep her healthy.  Very soon she'll be out on her own, and will have to make those choices.  For now she only wants to be concerned with eyeshadow colors, decorating her room and texting her friends.

But what caused me to be able to finally say NO and mean it?  In the past I've said no many times, but could never sustain the NO.  Why now?  While going for a walk, it dawned on me why.  Because I've finally healed myself of those same addictions.  When I was addicted to sugar and caffeine, I would try to say NO to her, but my own addiction would override the NO because my body was still saying YES.  It wasn't until I made the commitment these past 3 months to finally heal myself, that I can now say NO. 

And so this morning was a pivotal moment.  I can feel that I've turned a corner in my life.  I've made an amazing discovery and in the process not only deepened my connection to my daughter, but took a burden off her shoulders that she did not want to carry.

And so the quote goes "Healer Heal Thyself" ~ thank you, I understand.


Alicia and me, her Mom


Monday, October 18, 2010

Beef Stew

It's finally raining!  Oh how I've waited so long for some rain!  I didn't get very much of it though.  Darn clouds are just teasing me.  A little storm with some thunder and lightening would make me a happy girl but alas I must be grateful for what I can get.  Summer in the foothills of California are hot hot hot and dry dry dry!  And they last FOREVER!  So when fall does finally make an appearance I am more than ready!

These cold rainy cloudy days make me want to cook hearty stews and soups and bake breads and other delectable treats.  Nothing makes me happier than lighting some candles, playing a little Paganini, drinking hot tea and creating magick in the kitchen!  Well I guess there are other things in life that make me happy too, like a good hair cut and color and french manicured toes!! 

So today my kitchen smells of homemade bread and raspberry blueberry scones, mmmmmmm.  And for dinner how about a hearty beef stew?  Double mmmmmmm.  And how about dipping that homemade bread into the delicious sauce!  Triple mmmmmm!!!

Beef Stew
  • 3# beef chuck, cut into cubes
  • olive oil
  • 1/3 cup tomato paste
  • 3 tbsp balsamic vinegar
  • 2 tbsp flour or arrowroot powder
  • salt and pepper
  • 1# medium onions, cut into chunks
  • 1# small white or red new potatoes, halved if small, quartered if large
  • 1# carrots, cut into 1 1/2 in lengths
  • 6 cloves garlic, smashed
  • 2 bay leaves
  • 2 tbsp dried thyme
  • 3 cups water or beef broth
  1. Place beef and onions in a large pot with a little olive oil and saute on medium-high heat.  Once beef is almost brown, add garlic and continue cooking until all the beef is browned and the onion is translucent.
  2. Add tomato paste, vinegar, and flour or arrowroot powder.  Season with salt, pepper, thyme and bay leaf. 
  3. Add 2 cups water or beef broth, bring to a boil and simmer for 2 hours until beef becomes very tender.
  4. Add potatoes and carrots to pot with rest of water or broth.  Bring back to a boil and simmer for another hour until potatoes and carrots are cooked through.  Remove bay leaf before serving.

A delicious bowl of beef stew makes me warm and happy inside

I always like to make more sauce, so I'll add another cup of water or broth into the pot that I've mixed with a tbsp of arrowroot powder.  Feel free to add more spices or even more vegetables ~ for example this last pot of stew I made, I added cut up acorn squash that I roasted and peeled ahead of time.  Stews are great with lots of various root vegetables, so get creative!

If you don't have that much time to make this stew, go ahead and throw everything into a crockpot in the morning, turn onto low and in the evening you'll have a pot full of yummy goodness!

So I welcome fall with great relish and appreciation!  And I will continue to cook delicious meals made with the treasures of the season.  Now to find myself some persimmons!

What rituals and foods do you love to create in your home when fall arrives?

***************************************

Still have some zuchinni leftover from the summer harvest?  Check out my notes section at Kitchen Witch Coaching Facebook page for a wheat-free gluten-free Zuchinni Bread that'll knock your socks off!


Kitchen Witch Coaching website has been updated!  Have a peek!


November Newsletter is coming!  I know you won't want to miss a single issue, so if I don't have your email, post it here in the comments section and I'll be sure to put you in my contacts list.

Monday, September 27, 2010

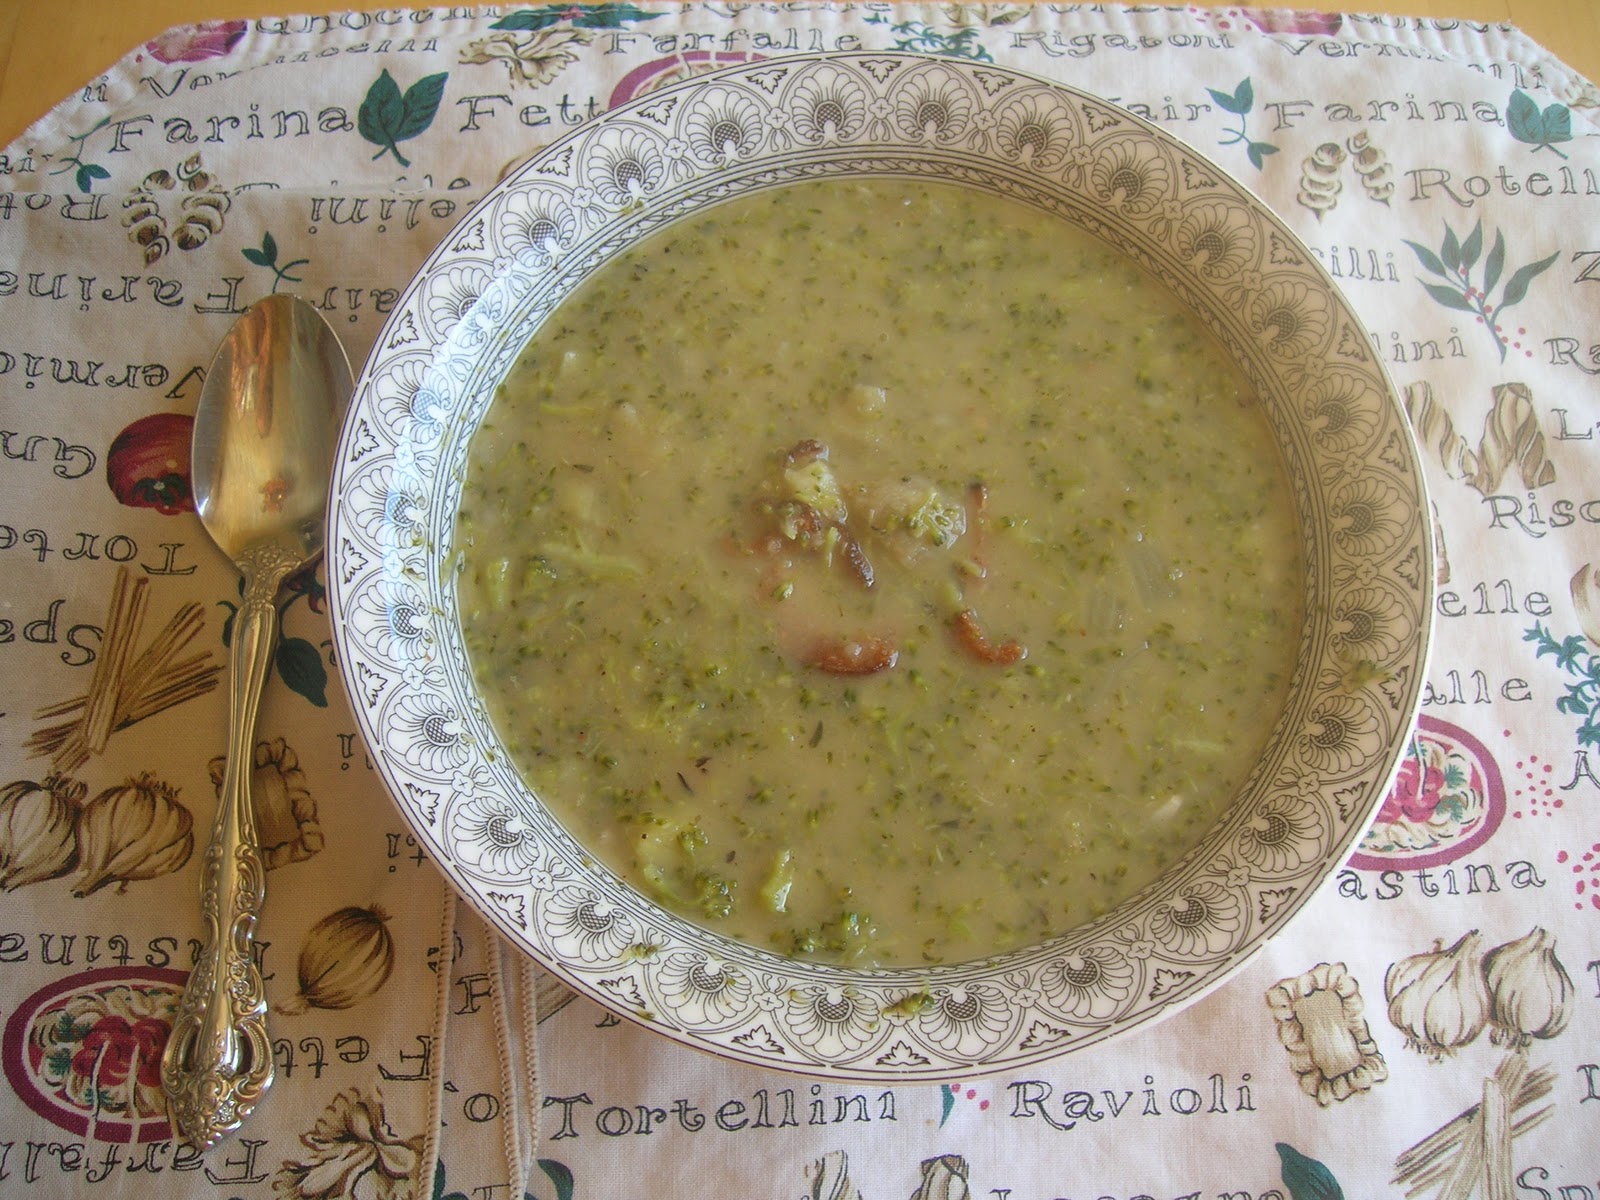
Broccoli Bacon Potato Soup

Come September Mother Nature and I go to battle with each other.  While I'm demanding cooler weather and fall colors, the sun continues to beat its hot rays down on my patch of earth while the AC clicks on once more.

Growing up on the northern coast of California, extreme temperatures in the 100's were not part of my awareness in September.  Instead my memories of September include apples, blazing oranges and reds, falling leaves, pumpkins, crisp morning air, sweaters, back-to-school, new clothes and pencil boxes.  Now living in the foothills of California several hours away from the ocean, summer insists on having its way during my favorite time of year, hence the battle.

I actually begin the fight by decorating my home with all my autumn decor on September 1 begging the summer heat to go away!  Apples, pomegranates, and figs begin to find their way into the fruit bowl as the summer peaches dwindle away.  I'm ready for fall!  I'm ready for the magickal stirrings of the land as the dry heat releases its grip and makes way for cool breezes and perhaps if luck will have it, some rain.

Even in the heat of the day, I find myself craving fall foods, especially soup!  So my Sunday in the kitchen consisted of making a broccoli potato bacon soup while cursing at the air conditioner.


Broccoli Bacon Potato Soup

  • 4 slices bacon, cut into small pieces
  • 1 large head of broccoli, chopped into small pieces
  • 1 medium yellow onion, chopped
  • 3 cloves garlic, chopped
  • 3 medium or 4 small yellow potatoes, cut into small pieces
  • 1 tbsp olive oil
  • 2 cups chicken broth
  • 1 cup milk (or non-dairy milk)
  • 1 tbsp dried thyme herb
  • 1 tsp each garlic powder, onion powder, cayenne pepper, coriander powder and nutmeg
  • 1 bay leaf
  • Salt and pepper to taste

  1. In a pot cook bacon until crispy, remove bacon from pan and place on paper towel leaving bacon drippings in the pan.
  2. Add to pot broccoli, onion, garlic and potatoes along with the olive oil.  Add the thyme herb and cook about 10 minutes until onion is translucent.
  3. Add chicken broth, the spices and the bay leaf.  Bring to a boil, turn down heat and simmer until potatoes are cooked through.
  4. Remove bay leaf and using a potato masher, mash the soup until smooth or leave a little chunky if you like.  (or place soup in a food processor to blend if you really like velvety smooth soup)
  5. Add milk, salt and pepper.  Taste and add more spices until desired taste is achieved.
  6. Spoon into bowls and sprinkle with bacon.


A bowl of fall yumminess!!

So the battle will continue and more soups will be made.  This morning I even placed pumpkins from the garden on the porch, and for dinner I'll be roasting acorn squash.  Perhaps Mother Nature will finally get my very big hint and stop this 100 degree weather non-sense.

How is fall coming along in your neck of the woods?

Wednesday, September 22, 2010

Leftover Quinoa

So what do you do with leftover quinoa?  Whenever I do cook a batch of quinoa, I always cook a little extra to keep in the fridge for the week.  I love opening the fridge to see a tupperware of leftover quinoa that I can transform into a lunch or a breakfast with the wave of my wand.

So this week I got a little creative and tried something new with my leftover red quinoa.  My first experiment was lunch.  I'll call it "Sauteed Veggie Quinoa with Egg and Tomato Basil Salsa".  I know its rather long, makes me feel like I'm on Chopped or Top Chef.  Of course you can take my creation and change out the vegetables to create your own taste sensation.


Sauteed Veggie Quinoa with Egg and Tomato Basil Salsa
  • 1 bulb fennel, chopped
  • 1 handful of ripped beet greens (or use a green of your choice)
  • 1 egg
  • 1 clove garlic
  • Handful of fresh basil ripped (why chop with a knife when you have hands that can tear?)
  • 1 cup leftover quinoa
  • Several spoonfuls of tomato basil salsa (see recipe below)
  • 1 tbsp olive oil
  • 2 tsp butter
  • Salt, pepper, and garlic powder
  1. Heat olive oil in a pan.  Add fennel and beet greens, sauteeing until tender.  Add garlic and fresh basil right before greens and fennel are done cooking.  Season with salt, pepper, and a little garlic powder.  Place veggies on plate.
  2. Add leftover quinoa and some water to your pan to get quinoa warmed up.  Let quinoa heat up while water evaporates making sure to stir so the quinoa doesn't stick.  Add the quinoa to your veggies.
  3. Now add the butter to your pan and once melted fry your egg however you like.  Add to the veggies and quinoa.
  4. Spoon some tomato basil salsa on top and enjoy!!
 Tomato Basil Salsa ~ chopped tomatoes, chopped basil, chopped garlic, chopped red onions, salt, pepper, olive oil, balsamic vinegar.  I don't measure anything on this one.  Just fill a bowl with your tomatoes, however much basil you like, as much garlic and onions as you like, season with salt and pepper to taste, olive oil is about 1 -2 tbsp but you can add more if you like, and vinegar is about 2-3 tsps.  Taste as you go and keep adding until you are happy!


A little lunch love

So that was my lunch.  This morning when I got up to make breakfast for the girls before school, my mind started humming again when I saw the last of the leftover quinoa and an apple in the fruit bowl.  Hmmmm, how about quinoa porridge with sauteed apples!


Quinoa Porridge with Sauteed Apples
  • 1 apple, cored sliced and cut in half (any kind of apple you like is fine)
  • Leftover quinoa
  • 1 tbsp and 1 tsp butter
  • Walnuts, chopped or crushed
  • Sea salt
  • Cinnamon
  • Maple syrup or Agave Nectar
  1. Heat a pan with the 1 tbsp butter, when hot add the chopped apples, sprinkle with cinnamon and let cook until soft (think apple pie filling)
  2. In a pot, place leftover quinoa with some water to warm up the quinoa.  Add the 1 tsp of butter and a sprinkle of sea salt and a dash of cinnamon.  (feeling creative? try other spices too ~ ginger, cloves nutmeg)
  3. Place quinoa in bowls and top with sauteed apples and walnuts
  4. For a little sweetness, drizzle with maple syrup or agave nectar

A Little Bowl of Delight

The easiest way to think of quinoa is to think of rice.  However you would use rice, replace with quinoa.  This gives you some variety in your diet and more nutrition.  The possiblities are endless with quinoa! 

You don't have to be a chef to create delicious meals.  With determination and a willingness to be adventurous you too can be a Kitchen Witch.


Want another quinoa recipe?  Check out my Kitchen Witch Coaching Facebook page. 
  • Just click on my Facebook Badge to the left of this blog
In the Notes section there is a delicious recipe for Quinoa Muffins!  Join me and all my fans as we celebrate food, nutrition, health and wellness.

Thursday, September 9, 2010

Wheat Free Gluten Free LOVE

I'm pretty sure I have an intolerance to wheat and gluten.  For years I've been trying to get rid of that awful "belly bloat" that makes me sometimes look like I'm 5 months pregnant, the painful cramps in my lower abdomen that make me lie on the floor in the fetal position, the dark circles under my eyes as if I forgot to take off my Maybelline and the continual stuffy "feel-like-I-need-to-blow-my-nose-but-nothing-comes-out-feeling." 

For several years I managed a food coop and in that role I discovered a whole new world of foods, including wheat-free and gluten-free products.  Off and on I made attempts at eliminating wheat/gluten foods from my diet, but my attempts were weak at best and the loaf of rice bread made a better door stop than a tasty sandwich.

Since enrolling at Integrative Nutrition this past summer, I made a serious committment to myself that once and for all I would solve the mystery of my ailments.  Though I have done a MUCH better job than I have ever done before in eliminating wheat and gluten, they still creep in.  But luckily being the scientist that I am, I take well to journaling and documenting my progress.  And so far, the results are definitely showing an intolerance.  Not an allergy, but an intolerance.  An intolerance that rips my intestines apart and leaves me achey and raw!  I even researched IBS and Celiac.  Thank the heavens I am not Celiac!  Though I do have great sympathy to those who are. 

So a little trip to the health food store, well not so little as I have to drive 50 minutes to get there, was like going to heaven!  So many new wheat/gluten free products on the shelves since those days of when I managed the coop.  I couldn't believe it!  And neither could my wallet!  Since then I've found breadcrumbs, pie crust, brownie mix, english muffins, bagels, and much more that I have yet to try.  But my one staple that I absolutely love is Pamela's Pancake & Baking Mix.  I use it for everything.  I actually buy it by the case at Amazon! 

Here is a little wheat-free gluten-free love for you and a bread machine recipe using this mix.  I told you I use it for everything!


Bread Machine Recipe
3/4 cup very warm water
2 tablespoons oil
2 eggs, beaten
1 tablespoon honey or white sugar
3 cups Pamela's Baking & Pancake Mix
2 pkg instant yeast (4-1/2 teaspoons)
1/4 teaspoon salt

Place all liquid ingredients into bread machine, then add dry ingredients. Turn on machine using white bread setting. This recipe makes a 1-1/2 pound loaf. Use a serrated knife to cut slices or freeze loaf first and then slice.

Try adding sesame seeds, poppy seeds or sunflower seeds to dough while mixing, or add 1/2 cup raisins and 1 teaspoon cinnamon. 
This bread makes fantastic grilled sandwiches, cinnamon toast, and french toast.

Bon apettit!

Wednesday, September 8, 2010

Embracing Me

There have been a few women in my life who have rocked my world.  Seems to be, that in the journey of my life, it has been women who have carried me along from one adventure, one experience to the next.  My umpteen jobs have always come about because of women.  My 9 year journey into my own soul came about because of women.  And even my passion for food and nutrition was inspired by women.

But there have only been a very few that have come into my life and literally transformed it; actually shaken me to the core.

Once such woman was Barbara Backus.  My senior year at CSU Sacramento, first day of school, sitting in Chemistry waiting for the professor.  In walks this red-headed woman in a white lab coat and proceeds to introduce herself and hand out the syllabus.  My chin was on the floor.  I couldn't move.  As my heart pounded, I could feel my brain actually killing off the old neuropathway that said "Only men are scientists" and begin the creation of a new one "Women CAN BE scientists!"

I spent every homework study hall in her office, even though I didn't need any help with my chemistry.  I just had to be near her.  Soaking in her scientist brain and desperately wanting to wear her lab coat.  Did I become a scientist?  No, unfortunately there still lived a voice in my head that had told me back when I was 20 that I couldn't be a scientist, that I wasn't good at math and science.  Well actually, that voice was wrong.  Very wrong.

I found out during that last year of college that I was actually VERY GOOD at math and science.  I scored all A's and those A's came rather easily.  My heart wept for the scientist in me that was graduating and going off to be a school teacher.  Within 5 years of teaching, I quit.  Teaching 6th graders the standards wasn't in my heart.

Since then only 2 other women have seen the scientist in me.  Yesterday, as I did a practice session with a fellow student at Integrative Nutrition (my current school), my heart was once again torn open.  After a half hour of going over my health history with this woman, she proceeded to show me how all the pieces of my life were strung together and she actually called me a scientist!  I was dumbfounded.  I was dumbfounded at how she completely saw ME!  The ME that I keep locked inside my heart, and here it was so obvious to her.

The only other woman in my life who has ever seen ME is my dearest sister in spirit, Tracy.  She is an artist, and an extraordinary one at that.  Not too long ago, back in the early spring, she sent me a package.  When I opened the package and saw the art she had created I exploded with spasms of sound that I don't think any human or animal has ever made.  There I was looking at myself wearing that white lab coat, hands on my hips, a look of "this is me world, I am a scientist!"

And now even as I write this my heart is pounding, to actually claim the word "scientist" brings shivers throughout my body.  A scientist, a nutritional scientist.  Can I actually call myself by that name?!  Can I actually shut up that voice of "I can't" in my head?  Can I actually embrace that love I had for Barbara Backus and her Chemistry class.  Can I finally after all these years embrace ME!